How to apply for Lifeline program – Step by Step
Learn how to apply for Lifeline program in 2026, verify eligibility, choose providers, activate service, and avoid de-enrollment.
Anúncios
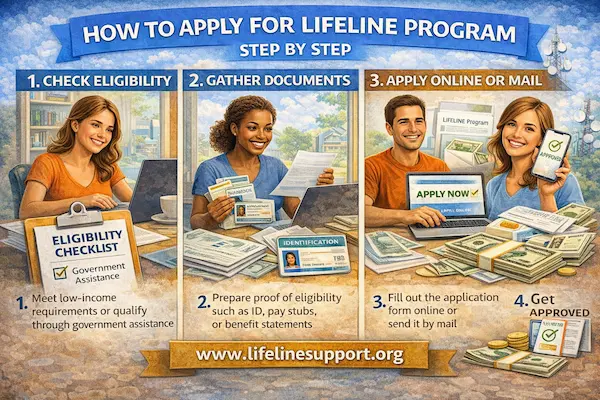
Apply for Lifeline program: what you’ll do from start to finish
You’ll follow a simple flow that keeps you from wasting time.
Anúncios
First, you’ll gather the right documents so you don’t get stuck mid-application.
Second, you’ll apply for eligibility approval through the official verification process used in most states.
Third, you’ll choose a Lifeline provider that actually serves your ZIP code.
Fourth, you’ll enroll using your approval details and pick BYOP or a device offer.
Finally, you’ll activate service and keep it active by following the rules that prevent de-enrollment.
Step 1: Gather documents before you apply for Lifeline program
If you prepare your paperwork first, the rest becomes dramatically easier.
In 2026, many applications are approved instantly when your information matches public benefit databases and identity checks.
When the system can’t confirm you automatically, you’ll be asked to upload documents for manual review, and that’s when preparation saves you days.
A simple best practice is to make sure your name and residential address are consistent across what you submit.
If your ID shows “Ave” but your benefit letter shows “Avenue,” try to keep your application address consistent with what official records use most often.
Proof of identity you should have ready
-
- Unexpired Driver’s License or state ID.
- Passport, if you have one.
- Birth Certificate, in some cases, depending on what the verifier accepts for your situation.
Proof of eligibility you should have ready
You’ll qualify either by program participation or by income, and you only need one pathway.
-
- If you qualify by program: a current benefit award letter, approval notice, or an official screenshot from your online portal for programs like SNAP, Medicaid, SSI, Federal Public Housing Assistance, or Veterans Pension and Survivors Benefit.
- If you qualify by income: a recent tax return or recent pay documentation that clearly shows income and dates.
Other details you will likely need
-
- The last four digits of your Social Security Number, or an alternative accepted identifier if you do not have one.
- A working email address and phone number where you can receive updates.
- Your physical residential address, not just a mailing address.
Practical tip: If you use a P.O. Box for mail, you can still be asked for a physical residential address for eligibility and household rules.
If your situation is unusual, follow the official instructions for documenting where you actually live.
Step 2: Apply for Lifeline program approval through official verification
In most states, you’ll apply through the official eligibility system commonly called the National Verifier.
This step is where your eligibility is confirmed before you pick a “government phone company” or Lifeline provider.
You’ll enter your legal name, date of birth, and address, and the system will try to confirm you automatically.
If it confirms you automatically, you can usually move forward right away.
If it cannot confirm you automatically, you will be prompted to upload the documents you prepared in Step 1.
When manual review is required, approval may take longer than instant results, so keep an eye on official messages and complete any document requests quickly.
What “manual review” means in real life
Manual review means an agent must review your documents because the system couldn’t verify you automatically.
This is not a denial by itself.
It’s usually a mismatch issue, a missing detail, or a record that cannot be confirmed through available databases.
Your job is to submit clear documents, readable photos, and exactly what the request asks for.
Blurry photos and cut-off corners are one of the fastest ways to trigger delays.
Timing reality in 2026
You may see “instant approval” when everything matches automatically.
You may see longer timelines when documents must be reviewed manually.
If you are asked to provide documents, follow the deadline in the request carefully, because applications can expire if the requested proof is not received within the stated time window.
Once you are approved, you typically have a limited time window to enroll with a provider using your approval details, so don’t let your approval sit unused.
State exceptions: where the process can differ when you apply for Lifeline program
Most states use the National Verifier process for consumer applications.
However, Oregon and Texas are known for using state-specific processes instead of the standard National Verifier application flow for many consumers.
That means if you live in Oregon or Texas, you should follow your state’s instructions or contact a provider that serves your area to learn the correct path.
You may also see references to California having state involvement for parts of Lifeline administration, so if you’re in California, verify the correct workflow for your service type and location before you start.
The safest approach is simple: follow the instructions shown for your state inside the official Lifeline application pages and official state guidance.
Step 3: Choose a provider after you apply for Lifeline program approval
Approval does not automatically give you a phone or activate service.
Approval means you are eligible to enroll with a participating provider that offers Lifeline in your area.
Your next move is to use an official provider search tool to find companies available in your ZIP code.
This step matters because a provider can be famous online and still not operate where you live.
When you search, you’ll likely see familiar names like SafeLink Wireless, Assurance Wireless, TruConnect, AirTalk Wireless, Q Link Wireless, Cintex Wireless, and TAG Mobile depending on your area.
Treat these as options to compare, not as guarantees of availability, speed, or device inventory.
How to compare providers without getting tricked by marketing
-
- Coverage where you live, because strong service at your address matters more than national claims.
- Data amount and throttling, because many plans slow after a threshold.
- Hotspot rules, if you need laptop access for work, school, or telehealth.
- Bring Your Own Phone (BYOP) support, if you want to keep a phone you already trust.
- Customer support options, because recertification and SIM issues are easier when help is reachable.
Step 4: Enroll with your provider using your approval details
Once you choose a provider, you’ll enroll with that provider using your approval information.
Some providers will ask for your Application ID or approval confirmation details as part of enrollment.
You’ll then choose whether you want to activate service through BYOP or request a new device if your provider offers one.
BYOP is often the fastest route because it can be as simple as shipping a SIM card or activating an eSIM if supported.
A new device route can take longer because of shipping and stock availability, and the device offered can change by ZIP code and inventory levels.
BYOP vs new phone: the decision that saves you regret
If you already have an unlocked phone you like, BYOP often gives you a better day-to-day experience than a random basic smartphone with low storage.
If you don’t have a device, a provider’s phone offer can be helpful, but you should keep expectations realistic, especially around premium models.
Many “free iPhone” or “free Samsung” offers are refurbished, limited, or upgrade-priced rather than brand-new current-generation devices.
If an ad promises a brand-new “Free iPhone 15 or 16” for everyone, treat it as suspicious until it is verified through official program steps and legitimate provider availability for your ZIP code.
Step 5: Activate service and follow the rules that keep Lifeline active
After you receive your SIM or phone, you’ll activate service and test it right away.
Make a test call, send a test text, and try a small data action like loading a web page to confirm everything works.
Then, protect your benefit by following the two rules that cause the most surprise disconnections: the 30-day usage rule and annual recertification.
The 30-day rule: “use it or lose it” for free service
If your Lifeline service is free, you generally must use it at least once every 30 days to maintain service.
Using it can be a call, a text, or data usage, depending on the plan type.
If you don’t use it, you can receive a notice and then be de-enrolled if you still don’t use the service within the stated notice period.
This rule hits hardest for seniors or anyone who rarely uses their phone, so set a monthly reminder to send one text or make one short call.
Annual recertification: the letter you should never ignore
Every year, you may be asked to confirm you still qualify for Lifeline, which is commonly called recertification.
If you are asked to recertify, respond immediately, because missing the deadline can remove your discount even if you still qualify.
If your eligibility changed, you may be able to qualify through a different path, like income qualification, but you still must respond and update documentation correctly.
A simple system helps a lot: keep your proof documents in one folder and check mail and email for Lifeline notices regularly.
Apply for Lifeline program: common mistakes that delay approval
Most delays come from avoidable issues, not from “bad luck.”
If you avoid these, you’ll usually move faster and with less stress.
-
- Mismatched address formats, like using a nickname street name in one place and an official format in another.
- Using a mailing-only address without providing a physical residential address when required.
- Blurry document photos that cut off corners or hide dates and names.
- Applying twice with slightly different details, which can create identity matching issues.
- Choosing a provider that doesn’t serve your ZIP code, which causes enrollment loops and wasted time.
FAQ
Do you get a phone automatically after you apply for Lifeline program approval?
No, approval confirms eligibility, but you still must enroll with a Lifeline provider to start service.
A phone offer, if available, is typically a provider promotion and can vary by ZIP code and inventory.
Can you apply Lifeline to both phone and internet?
In most cases, you apply the Lifeline discount to either phone or internet, but not both at the same time.
You choose the service that matters most to you right now.
How long does it take to get approved?
If your information is verified automatically, approval can be quick.
If you are asked to upload documents for manual review, it can take longer, so responding quickly and submitting clear documents is the best way to speed things up.
What if you live with roommates or extended family?
Lifeline has a strict one per household rule, and “household” is usually based on shared income and expenses.
If you live at the same address but do not share finances, you may be asked to document separate household status through the official household process.
How do you avoid scams while applying?
Use official application steps first, choose providers only from official provider search tools, and be cautious of ads that promise guaranteed premium phones or demand unusual payments.
Reminder: This article is independent and informational.
We do not control eligibility decisions, approval timelines, provider availability, plan terms, device inventory, verification outcomes, or enforcement for any agency or third party mentioned.